Monday 27 June 2016

Broken Gearbox - Phase 6 Engine Install

Broken Gearbox - Phase 6 Engine Install

Phase 6 - Last phase. Install the engine connect up and finish!

After completing the new gearbox install on Saturday morning it was time to install the engine!

Texted good Friend Matt (aka Mr Quickfit!) and asked for balancing hands and also his larger trolley jack to help install the engine.

Matt & his van Frank arrived. It so much easier to lift engine and install with another pair of hands.

Despite the 20 degree slope on my drive we managed to lift the engine and roll it towards the awaiting gearbox.

First attempt was slightly tilted at the top (looking back the slope on the drive will mean that as it goes in it needs to be lowered to compensate) but after lower and a little bit of wiggling in slid the engine.

Quickly in with the engine mounting bolts & nuts. Engine was in!

Installed & connected up fuel lines, filter and all associated auxiliaries.

Struggled for an hour trying to get braided accelerator cable into locking bolt on throttle body. Every time we cut the braided cable the cutters crushed the braid meaning it would not go in. In the end enlarged the hole with a drill to give the braids in.

Decided to install battery and start engine without rear tin and valance to confirm we had 4 forward gears, neutral and reverse.

Engine started first time once the fuel had pumped through. No leaks. Sound mean with only the CAT in the exhaust!

Checked clutch and all 4 gears and wheels rotated correctly and reverse was good. It was great to see the wheels move again!

ALL GOOD! No leaks no issues!

Installed exhaust - The rubber mounts are tricky to clip over the hangers BUT Matt just clipped them in straight away and has now been given the nickname "Mr Quickfit!" as I think he might have been an exhaust fitter at Quickfit in a former life!

First Drive Impressions:

Rear valance installed dropped off axle stands and chocks away.

Getting off the drive was very nerve racking but away we went for first drive round the block!

First impressions - Same acceleration in 1st and 2nd. 3rd is much longer allowing me to get over 50 mph before changing. Did not really get much 4th gear yet.

No more crunching going in to 2nd! I always thought this was my gear level adjustment but it was actually the old Brazilian Gearbox (RIP!)

Clutch is a little softer but might need some adjustment to tighten it up. Good gear selection but a little stiff but I am sure once the gearbox oil as got everywhere and starts to wear in. The hockey stick was a little tight on the gear selection forks so this is to be expected.

I am SO PLEASED! All that hard work and late evenings, grease and oil have paid off and the replacement gearbox is so far so good.

Next few days of shakedown testing and a re-check of all bolts and a CV clip to replace.

The Big Thank you!

I could not have done all this without the support of my Family and Friends and I would especially like to thank the following people.

My beautiful, supportive and loving wife Charlotte

You have supported me throughout this giving up your car, driveway, evenings, husband and allowing me to erect the "party tent" while still bring me cups of tea and kind words of encouragement and support through all of this. I could not have done this without you. I love you x.

My Boys

Thanks must go to my two great boys who lost their dad for a week. Thanks for taking an interest and asking about the progress and the thumbs up through the sitting room window. A dad could not ask for better two sons and I am really proud of you both!

Mr "Quickfit" Matt.

Your supportive words and helping hands throughout this have been great. Your ability to clip exhaust mounts on in a flash amaze me. You and your family having to go to bus stop over without us. Your a true Friend.

DazDub.

Online Member of the Brazilian Bay forum who did a Beetle / Brazilian bay gearbox swap a few years ago and wrote it up on the forum. Never met you but thanks for your write up and advice.

Anyway that's all folks!

More updates with progress and any debugging will follow.....
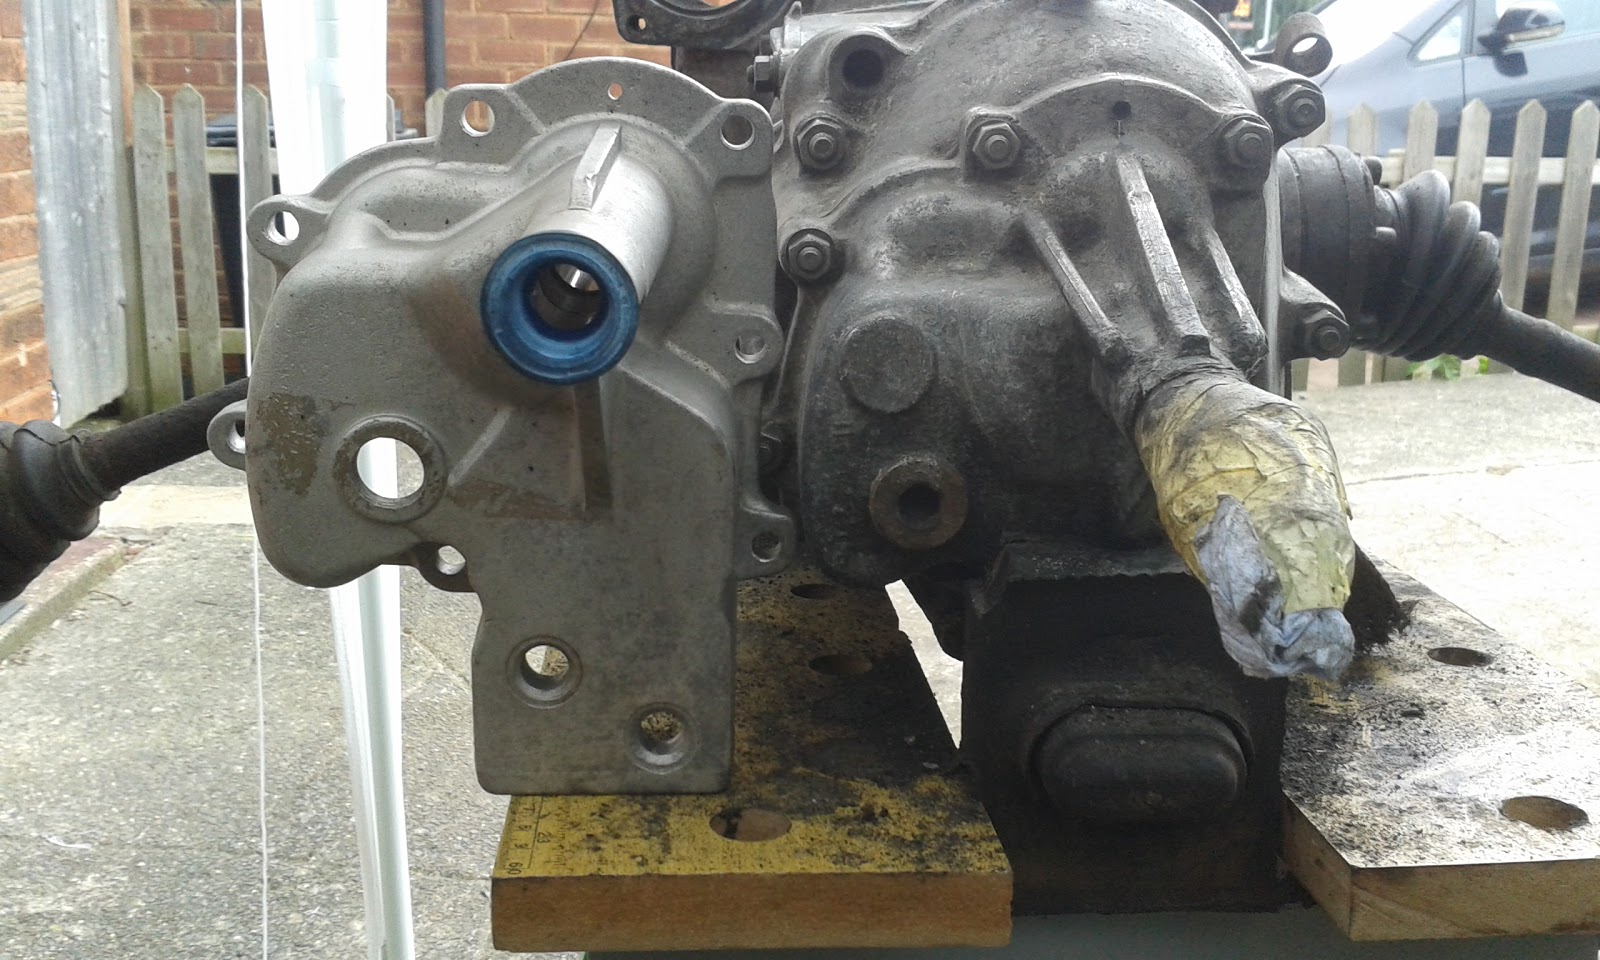
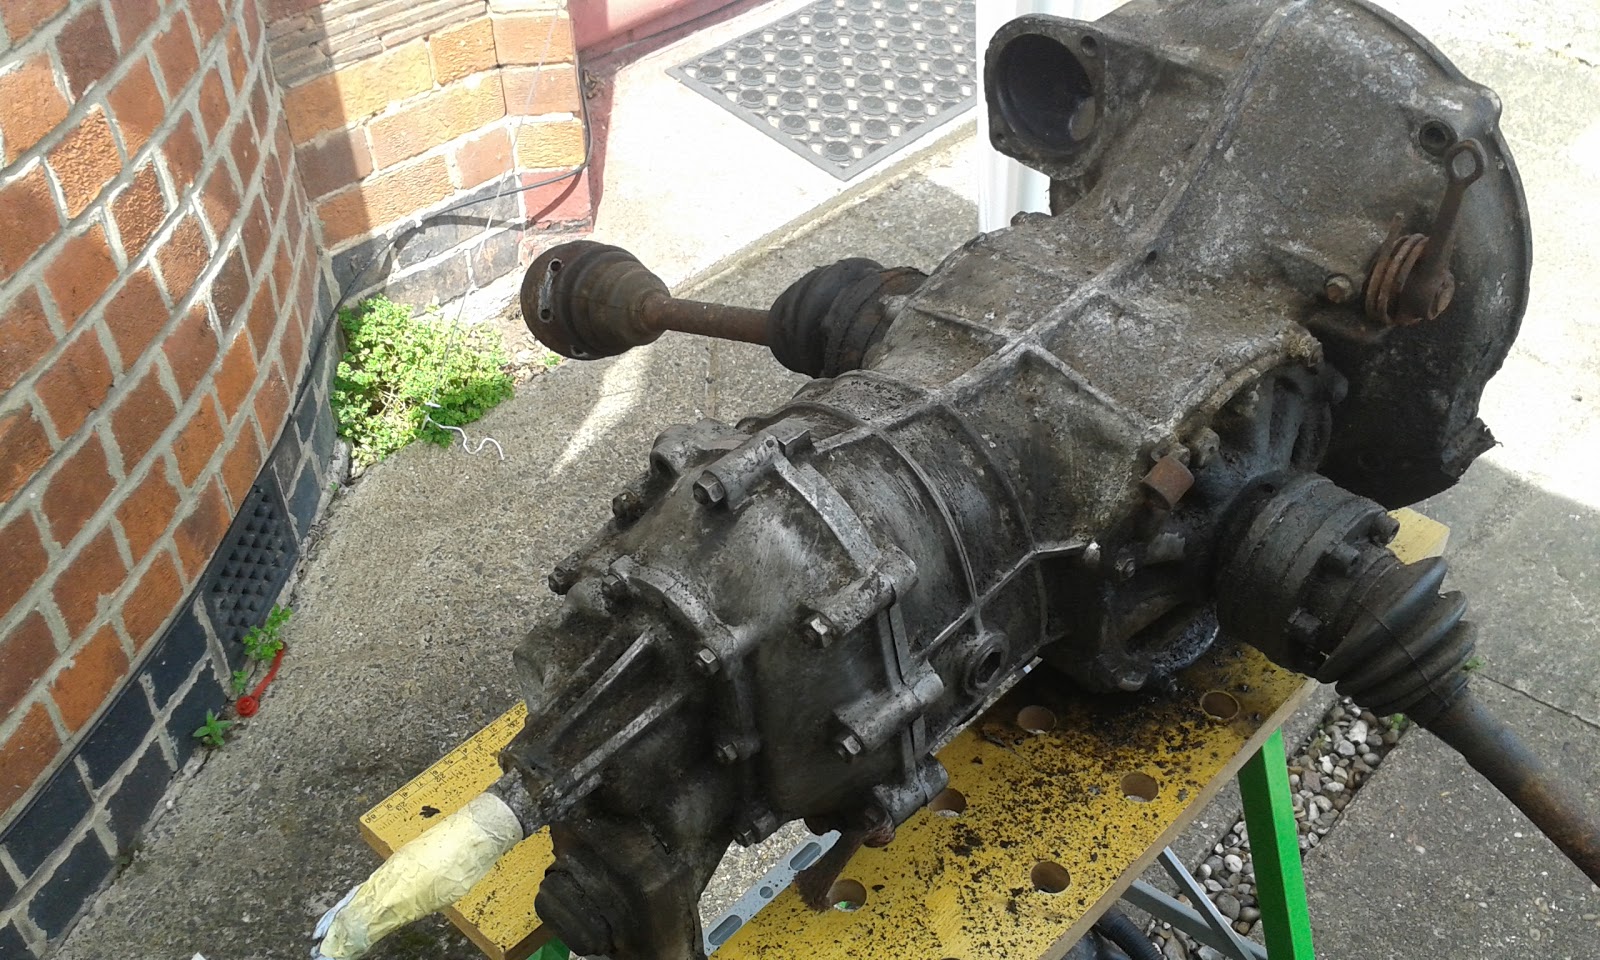
Broken Gearbox - Phase 5 New gearbox Install

Broken Gearbox - Phase 5 New gearbox Install

Next Phase 5 was to install the gearbox on Friday afternoon. Despite the rain showers the install went OK.

Major problem was the EMPI aftermarket front mount! There are just 4 holes. Two go on the gearbox and two mount to studs on the chassis from gearbox mount. Bolted to the gearbox was done in phase 4.Once the gearbox was mounted and the rear 27mm bolts installed but not torqued down. The two outer holes only one would line up enough to get the nut on!

Spent the next 3 hours attempting to adjust to get the 2nd nut on. G-Clamps, crowbars and lots a swearing did not make it want to fit.

Removed the mount and found it was curved so always one hole would never line it.

Another failed attempt led me to revert back to the stock Brazilian mount! Which of course fitted in 2 minutes!

The lesson is 

"Aftermarket parts never fit without modification, Stock parts quickly fit first time every time!"

I assume in a car factory assembly line time is critical and stock parts must be able to fit quickly first time.

So once the mount was secured in CV joints where fitted up but not torqued down. Most other items where installed such as Bowman Tube and Clutch cable etc.

Here is the finished install:


Rear EMPI Mounts & 27mm Bolts:


Left & Right Beetle Inner CV Joints:


Stock front mount (with additional new earth wire)
:

Front Linkage:

So finally stopped at 9pm on Friday night with everything installed.

Saturday morning started at around 11am. Torqued down 27mm rear bolts and front mounts. CV joints torqued down and boot clips installed.

Starter motor refitted & reverse light switch connected.

Saturday Lunch all finished ready for Phase 6 - Engine Install!


Friday 24 June 2016

Broken Gearbox - Phase 4b Swap Gearbox Parts

Broken Gearbox - Phase 4b Swap Gearbox Parts

Phase 4b of the gearbox replacement is to continue swapping over parts & re-building of the replacement gearbox for installation.

Phase 4b was to complete the following:
  1. Finish Gearbox mounts installation
  2. Starter motor earth lead & Reverse switch cable
  3. Gearbox plugs & Refill gearbox
  4. CV Joints & Boots install on van

Finish Gearbox mounts installation

After last phase 4b I had to continue to get the EMPI aftermarket mounts on the gearbox cradle.

EMPI gearbox mounts:


The curve of the mounts did not quite match the curve of the cradle BUT once bolted down all seems good.

Close up of rear mounts & Fount mount


Starter motor earth lead & Reverse Switch Cable

Attached the starter motor to rear mount. Cleaned up contacts to make good electrical connection as this is stater motor and also engine main earth connection.

The beetle gearbox has another front cable (to the right of image above). This was to connect to the front mount. I will purchase a new one and add one anyway. The Brazilian Bay does not seem to bother with this one. It just relies on the rear connection through the cradle and onto the gearbox chassis forks.

You can never have enough clean earth points!

Install the reverse switch cable loom after cleaning contacts.

Gearbox plugs & Refill Gearbox

Installed lower plug and refilled with clean new gearbox oil. Filled 2 Liters of 75/90w GL-4 Semi-synthetic oil. Could do with topping up. Will drain and refill again after a few hundred miles.

CV Joints & Boots install on van

Finished cleaning the Beetle CV joints. One on the right hand side is a much stiffer than the left. Washed in Petrol then brake cleaner solvent. The coated with WD40.

Back under the van again. Installed CV Boots onto driveshafts. Gosh that was hard! The rubber is very tight and pushing the rubber boot over the driveshaft was fun! Managed to wiggle & rotate and push all at the same time.

Then it was concave washer, CV Joint, C Clip. Sounds simple but packing them with grease was hard to get in all the bearings. Messy job but all sorted.

Have not installed boot outer clamps yet as wanted to get the CV joints bolted to the replacement gearbox in place first to get boot distance correct. New boots are very good and flexible.

Boot in place


CV Joint Installed


Bolts are just to get alignment of boot to joints. Remember to get your clamp on before your boot!

There was some extra distance of the drive shaft to either the C-Clip or concave washer. Not sure if this is an issue BUT I suppose when CV is bolted firmly to the gearbox the joint will not move. 

So we are already to go to the next phase 5 - Replacement gearbox install!

Gave up a little early and finish by 10pm as I was tired and it was starting to rain.

Phase 5 Gearbox install on Friday! Finish work at 3pm so might be able to get install completed in one go........ Stay Tuned.


Thursday 23 June 2016

Broken Gearbox - Phase 4a Swap Gearbox Parts

Broken Gearbox - Phase 4a Swap Gearbox Parts

Next phase under progress. This phase is to swap parts from old gearbox and start mounting them on the replacement (new) gearbox.

The parts required for swapping and new replacements are:

  1. Beetle CV Joints - Clean and inspect for refitting with new boots
  2. Brazilian CV Joints - Remove from driveshafts  (keep) on van
  3. Brazilian Gearbox - Nose Cone, reverse switch & hockey stick
  4. Clutch Return spring - Fit new to replacement gearbox
  5. Clutch Bearing - Inspected Brazilian and going to reuse
  6. Gear selector boot - reuse boot at front of nose cone
  7. New Gearbox mounts - Fit EMPI urethane mounts

You could fit all new parts such as Beetle CV joints, Clutch bearing etc BUT I only wanted to replace parts which actually involve removing the gearbox. parts like CV joints can be fitted another time. 

My philosophy is only change what you can't change later and the more you change the more things can go wrong.

So the work started. Its currently Wednesday 22/6/16 and its Day 6 since I broke the gearbox. Only working evenings so its taking longer than I would like.

Beetle CV Joints - Clean and inspect for refitting with new boots

Removed from Beetle drive shafts. Marked which side they came from. Wiped up as much grease as possible and soaked in petrol. One side was a little bit more stiff but should be OK. You could replace them with new BUT then I would have old Brazilian outer and new beetle inner CV joints. I will get round to replacing all CV at the same time but in the future. At £50 a joint it is for another time.

The beetle inner CVs will be re-used but treated to a good clean, grease and a pair of new boots. Stored for Phase 5.

Brazilian CV Joints - Remove from driveshafts  (keep) on van

Have to remove the CV joints as they are too big to fit the beetle gearbox (Bus ones are 100mm Diameter and Beetles are 94mm) but the driveshaft is identical.

Brazilian CV joints ready for removal:


Spring clips are a pain to get out. My circlip pliers are now bent! (One thing I did notice is that the Brazilian ones have a black rubber gasket on the mounting face)

Drive shafts stay in place:


OLD Brazilian CV joints & Boots:


Messy JOB! Plenty of rags, solvent & gloves used:


Drive Shafts awaiting Beetle CV Joints & Boots:


Brazilian Gearbox - Nose Cone, reverse switch & hockey stick

Time to remove the replacement gearbox nose cone and swap over with the Brazilian one.

11mm bolts are used on Brazilian and 11mm nuts are used on a Beetle gearbox.

Easy swap. Just had to ensure (hopefully) that the hockey stick is located in the selector forks are all in neutral (full pulled out)

New paper gasket & sealant used to ensure it won't leak. Sorry no photos taken of this step but plenty of images on-line.

Here is the differences:


This is a replacement (new) nose cone (left) and the beetle gearbox right. I did not use the replacement as I did not have a replacement hockey stick.

Suggested to grease front seal to ensure a smooth gear selection and also to help seal against leaks.

Clutch Return spring - Fit new to replacement gearbox

This was fun! Over an hour getting a new spring onto the replacement gear box arm!

The replacement gearbox arm was in good condition but the spring had rusted and snapped.

I found this instruction online which explained the process.


Sounds simple! Well it is not! Managed to slip a screwdriver in 2 and another to loop spring over 3!

Picture of new spring!


Clutch Bearing - Inspected Brazilian and going to reuse

Inspected my old clutch bearing and was not planning to replace clutch plates so just a simple swap over. Made sure to grease ALL clutch parts in gearbox bell housing.

Picture of clutch bearing


Gear selector boot - reuse boot at front of nose cone

Simple push on rubber boot! Easy job.


New Gearbox mounts - Fit EMPI urethane mounts

Another horrible job! Should have bought stock gearbox mounts. But went for the stronger less noisy. Aftermarket stuff mostly does not fit!

Front one easy. Just two bolts & nuts.

Rear ones have to be bolted to the bell housing and then the outer bolts to the under gearbox yoke / cradle.

That's the theory BUT the mounts are not curved enough and don't fit the yoke correctly. So 3 of the bolts fit but the outer edge one does not.

Time to give up for tonight! Was hammering & hack sawing 2mm off a bolt at half midnight is a sure way of upsetting the neighbors!

So Phase 4a Swapping over gearbox parts is continuing tonight! so Phase 4b is coming soon..........Stay tuned!


Tuesday 21 June 2016

Broken Gearbox - Phase 3 Old Gearbox Removal

Broken Gearbox - Phase 3 Old Gearbox Removal

So next phase is removal of the broken old Brazilian Bay Gearbox. If you have been following this blog you will have seen the issue with the old gearbox and heard the clunking grinding of the original gearbox and my plans to remove and replace.

This phase 3 is removal of the old gearbox. Being an IRS gearbox with driveshafts and CV joints this will make life a lot easier than the swing axle style.

So here is where we are at:


Remove CV Joints:


Using a 12 spline socket (8mm) and giving each bolt a good spray and clean out all rust, mud , oil & crud before undoing.

Rotating the wheel round gives better access.

Other Stuff to remove:

Now onto the Gearbox Linkage at the front. Put it in 1st or 3rd gear undo small 8 square bolt after removing the securing wire at the front of gearbox. Then put in 2nd or 4th gear and it should separate.

Clutch cable undo wing nut fully, then pull down on bowman flexible section to remove from tube mount of gearbox.

Reverse Light switch - Just unplug handy connector block.

Gearbox Mounts:


Spray and using a 27mm socket (I had to buy one!) and breaker bar loosen these massive bolts!

The front mount has a 17mm nuts on the mount or gearbox. I removed all 4 .

Then placed a trolley jack a little front of the drain plug & pulled.

Out!


Now drained oil:


Might be some metal particles on the drain PLUG!

Most of my differential and final drive!

What's left behind:


Onto the next Phase 4 - Swap parts over from old to new gearbox........ Stay tuned!

Broken Gearbox - Phase 2 Engine removal

Phase 2 - Engine removal.

Progress on gearbox replacement has involved removing the engine.

I have done this many times on Classic bays and beetles BUT never on a Brazilian. Basically its the same process made harder by all the Fuel Injection pipes & wires BUT easier with the removable rear valance.

Not going to write a fully instruction guide here but I am documenting the process for others to follow and will be in the next service manual update.

Read to go! 

Jacked up & on axle stands:

Brazilian T2c Kombi Bay - UGA Engine Removal

My new Party Tent! I need a garage / workshop!

View from underneath:

Brazilian T2c Kombi Bay - UGA Engine Removal

Rear Bumper & Valance removed:

Brazilian T2c Kombi Bay - UGA Engine Removal

Engine out:
Brazilian T2c Kombi Bay - UGA Engine Removal

The only thing I would say is remove the F**king Exhaust as I had planned but the mounts where stubborn and I thought I can do it with out removing it!

How wrong ! I could not lower the engine as injectors over hang the edge of the engine bay and could not pull it any further backwards as the exhaust flange hit the heads!

So I was stuck and doing it on my own! Stupid Idiot!

Anyway I managed to rotate the engine to about 45 degrees on the jack and slide it out.

Your next!

Brazilian T2c Kombi Bay - UGA Engine Removal


Next up Phase 3 Removing the old Brazilian Gearbox!....... Stay Tuned......

Monday 20 June 2016

Broken Gearbox - Phase 1 New gearbox

Phase 1 - New Gearbox

Purchased a 2nd Hand Gearbox from the Beetle breakers. AH code from 1302s Beetle. IRS German built gearbox from the 1600cc beetle (approx 1970s)

This is how it arrived.

AH Code 1302s Beetle Gearbox + CV and driveshafts

Its has sat for 20 years in a garden in the back of a rotting beetle. Supposedly only done 34,000 Miles and the engine was still running.

Its great that I still have the CV and drive shafts as these will come in useful later. Minus the stater and also the clutch return spring has rusted and snapped. Covered in grease (mostly CV and engine oil)

So drained the gearbox oil. Still nice and brown with hardly any metal fragments on the drain plug magnet.

Set upon cleaning it with clutch cleaner and a wire brush.

About half way through having removed some dirt!


Getting Cleaner


Cleaner still after about 4 hours!


So it was time to remove the CV Joints. This would be "normally" done when they are connected to the wheels but I did not have the option.

So improvised some angle steel to hold the outer CV joints in place. Using the 12 Spine socket away the come (remember to clean out the spline nuts of all grease and crud)


That's better nice and clean CV flanges.

Shame I am not as clean


Must be a case of "German Gearbox Measles"

Replacement gearbox stripped down so far. Have ordered a new Clutch return spring. Its going to be fun to fit without trying to take the clutch arm off.

That's it for Phase 1. Replacement gearbox Cleaned and ready.

Phase 2 - Engine out coming soon........ Stay Tuned.

Broken Gearbox :-) The Video

Quick update & video

This was taken when I had to reverse the van out of the drive and reverse back into the drive facing backwards all with a broken gearbox!

Reverse gear seemed OK but selection of others was very rough and knocking grinding noise can also be heard.

Sorry about my phone falling over - still a nice view of the clouds!

Had to move the van as I can only really work with the front facing the road. Sorry Betty to torture your broken gearbox!


Enjoy!


Broken Gearbox ;-(

Broken Gearbox!

Thursday 16th June 2016 is the day my Brazilian Bay Gearbox Died!

The Incident:

Never been very happy with the noises my gearbox in my Brazilian Kombi made since I bought it, always wining when de/accelerating and trouble selecting 2nd gear.

Today was the day it finally gave up. Reversing off the drive in the morning is always tricky as the Chelsea Tractors going to the grammar school always speed down our road. I saw a chance to reverse out and a 4x4 was coming fast down the road. So once out I decided I better get moving fast so into 1st gear and up rather rapidly with the clutch. Slight wheel spin on one rear wheel and the other took grip.

Lots of shuddering as the van started to move and van popped out of 1st. Shoved back into gear and started moving away slowly and a horrid noise every rotation of the wheel like a clunk-clunk noise emanating from the gearbox on the left.

Tried 2nd gear and same noise and crunching and grinding sounds. Made it round the corner frantically selecting any gear which would not grind. Did a random U-Turn and made it back to home.

So I think the differential or final drive has gone and the gearbox is eating itself internally from within.


The Replacement Choice:

So I was on the hunt for a new gearbox. Many options but no Brazilian OEM gearboxes available and would not want another poor quality gearbox again.

So the Brazilian Kombi uses a hybrid gearbox which is mounted from below at the rear like a Late Beetle IRS gearbox (mounted on two forks which come out from the chassis. The front of the gearbox mounts similar to a late bay with a longer nose cone.

So the hunt started for a Late Beetle IRS gearbox. From the on-line gearbox codes my options are:


CODE
1st
2nd
3rd
4th
Final Drive
Rpm
@60mph
Info
Year / Type / Engine cc
Brazilian
3.80
2.06
1.32
0.88
5.143
3800
IRS from 97 1600 Brazil
AH
3.80
2.06
1.26
0.89
4.125
3100
IRS from 8/68 – 8/72 1500/1600
AS
3.80
2.06
1.26
0.93
3.875
3000
IRS From 3/72 1600 (GT)
AT
3.80
2.06
1.26
0.93
3.875
3000
IRS 1303s from 3/72 1600
AM
3.78
2.06
1.26
0.93
4.375
3400
IRS Saloon from 8/70 1300

Then using the on-line gear ratio calculation at:

http://calc.teammfactory.com/

You get a graph for 2 different gearboxes (original and replacement)

As I suspected the Brazilian gearbox Ratios are higher rpm in 4th gear at 60 mph topping a 3800 rpm. I have found that the engine RPM is very high when traveling on a Motorway and fuel consumption is poor compared to a classic late bay.

I suppose in the heat, poor roads and steep inclines of Brazil you would want to keep more higher rpm for acceleration, lower top speed and better cooling running the higher rpm. In the UK / Europe you have more motorways and cruising.

Any of the beetle gearboxes are going to give a lower rpm in 4th gear. The downside will be slightly longer to get there BUT less engine wear.

So my options are:


  1. NEW Brazilian - There are NO Brazilian replacements available in the UK. Also why would you ever want a low quality gearbox.
  2. NEW Beetle / Bus - There are new gearboxes for Beetles / Bus available BUT at over £1500-£5000 way out of price range
  3. Reconditioned - Many companies re-con old VW gearboxes - They nearly all ask for your old gear box in exchange or a surcharge. Some varying quality and warranty. Choose wisely and also they might not take your old gearbox and warranty issues if you remove parts from it and DON'T expect a straight Brazilian swap you will have to get a beetle and modify it to fit! Prices are generally £800- £1500.
  4. Second Hand - There are some of the above Beetle gearboxes available mostly on e-bay etc. The lack of interest in late (1302/1303) IRS beetles helps but yet again there are not many about as most people exchange for re-con units. Again choose wisely. You will not get a warranty on a private sale. Some of the second hand parts suppliers do have them available. Prices Start from £150-£300
My choice was number 4 to go to the low cost risky second hand. The search found found that these are the typical prices.

Code AM £200
Code AH £280
Code AT £350

So as you can see the AT (1600 GT) is the most popular and rarer model. The AM is the basic 1300 simple model.

The Replacement:

So I looked on e-bay and found a few BUT I really wanted to physically see the gearbox to give it the once over before parting with nearly £300!

After ringing around found some US imports but not local.

Then I contacted my friendly local beetle breakers and yes they had a rarer 1302s (1600 model) beetle gearbox complete with CV & drive shafts. They wanted £300 But after a little negotiation I got it for £270 (Minus the starter motor)

So I could collect it on Thursday evening (same day as breaking it to sourcing a replacement!) Drove the 10 miles up the M1 in the most horrible rain storm to collect.

Here she is:

AH Beetle Gearbox - 1302s (1600) IRS gearbox


Not the most clean or best condition but the beetle had spent 20 Years under a tarp in a front garden. The history well the beetle had only done 34,000 miles and then was left in the garden. The engine (still working) was sold and the body cut up by the breakers as it was very rotten.

So next steps will to be continued as work progresses BUT the phases are:

Phase 1 - Clean & Strip New gearbox
Phase 2 - Remove Engine
Phase 3 - Remove old gearbox
Phase 4 - Swap Over old parts to new gearbox
Phase 5 - Fit new gearbox
Phase 6 - Refit engine

To be continued..... Stay Tuned for progress & updates.